The Best Caulking Tools: What You Need for a Smooth Finish

Achieving a smooth finish with caulking is not just an aesthetics concern. It’s a functional one, crucial for ensuring that pretty line of caulk you put down does its job now and well into the future. Whether you’re sealing gaps around windows, doors, or tiles, the right caulking tools can make all the difference between a job well done and one that might need to be redone all too soon. Today we’ll explore the best caulking tools, the kind the pros use—tools that will get you to that smooth, flawless finish you’re after while ensuring long-lasting protection.
Importance of Using the Right Caulking Tools
Professional caulking tools aren’t just time savers. They reduce frustration, which in and of itself can help lead to a smoother finish; no one wants to struggle with the tools they’re using. Additionally, using the wrong tools can result in common issues such as uneven application, excessive mess, or even damage to the surfaces you’re working on. Whether you’re a seasoned pro or a do-it-yourselfer, using professional caulking tools is one of the keys to project success.
Essential Caulking Tools
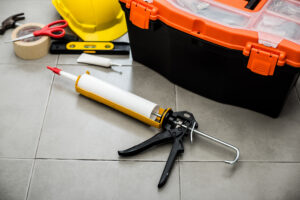
Caulking Gun
A caulking gun, as you might expect, is the big gun of any caulking job. Again, the right tool makes any job easier and leads to better results. It’s best not to skimp here. There are several types of caulking tools to choose from, each offering different levels of control and ease of use:
- Manual Caulking Guns
These are the most common and affordable options. They require manual pressure to dispense the caulk, making them suitable for smaller projects. - Electric Caulking Guns
Ideal for larger jobs, these guns reduce hand fatigue by automating the dispensing process, and provide a little more control over the flow of caulk. - Pneumatic Caulking Guns: Powered by air compressors, these are perfect for heavy-duty tasks and provide precise control over the flow of caulk.
When choosing a caulking gun, consider the type of project you’re working on, the frequency of use, and your comfort level with different tools. Some forethought can make all the difference.
Caulk Finishing Tool
A caulk finishing tool is essential for achieving a smooth, professional look. There are various types available, including spatulas and smoothing tools. These tools help you shape and smooth the caulk after application, ensuring a neat finish. Using a finishing tool also reduces the likelihood of leaving gaps or uneven lines, which can compromise the seal’s effectiveness.
Utility Knife
A sharp utility knife is crucial for cutting caulk tubes and cleaning up edges. Emphasis on the “sharp” here. Precision is the key when working with caulk, and a dull blade can lead to jagged cuts or uneven application. Keep your utility knife sharp or get a new one if you have to.
Caulk Remover
Removing old caulk is an important step in any caulking project, and using the right caulk remover can make this task much easier. There are two main types:
- Chemical Caulk Removers
These removers break down the caulk for easier removal, but they require careful handling and proper ventilation. - Mechanical Caulk Removers
These tools physically scrape off the old caulk without the need for chemicals, making them a safer option for some surfaces.
Caulk removers ensure a clean surface for the new caulk to adhere to, crucial for a long-lasting seal. You’d never paint over rust, right? So never put down new caulk over caulk remnants.
Painter’s Tape
Painter’s tape is a simple yet effective tool for achieving clean, straight caulk lines. Apply the tape along the edges where you don’t want your caulk to spread, and remove it carefully after smoothing. This technique helps prevent messes and ensures a tidy, professional finish.
Additional Helpful Tools and Accessories
Gloves and Safety Gear
Protecting your hands and skin is important when working with caulk, especially when using chemical removers. Be a pro and wear gloves. You’ll prevent irritation and keep your hands clean.
Cleaning Supplies
Having rags, sponges, and cleaning solutions on hand is essential for both preparation and cleanup. As we’ve already mentioned, properly cleaning the surface before applying caulk ensures better adhesion, while thorough clean up afterward helps maintain the quality of your work.
Nozzle Tips and Extensions
Nozzle tips and extensions are useful for reaching tight or awkward spaces that a standard caulk gun might not be able to access. They allow you to apply caulk more precisely, reduce the risk of mess, and better ensure a consistent finish.
Caulking Tips: A Guide to Using Caulking Tools for a Smooth Finish
- Preparation
Start by cleaning the surface thoroughly, removing any old caulk with a caulk remover. Ensure the area is dry and free of debris before proceeding. - Application
Load your caulking gun with the appropriate caulk, cut the tip at a 45-degree angle, and apply a steady bead of caulk along the seam. - Finishing
Use a caulk finishing tool to smooth the caulk, pressing lightly to create a clean line. Remove excess caulk with your (again, sharp) utility knife or a damp rag. - Cleanup
Clean your tools immediately after use to prevent the caulk from hardening. Store your tools properly to keep them in good condition for future projects.
Common Mistakes to Avoid
- Over-Applying or Under-Applying Caulk
Applying too much caulk can create a mess, while too little may not provide a proper seal. Aim for a consistent bead. - Not Smoothing the Caulk Properly
Failing to smooth the caulk can result in an uneven finish and may affect the seal’s effectiveness. Again, it’s about more than aesthetics. - Ignoring Proper Surface Preparation
We can’t stress this enough: skipping proper preparation can lead to poor adhesion and a shorter lifespan for the caulk.
Form and Function
Before your next project, read through these caulking tips a few times. Let them sink in so you can get into the flow of the job. Because no matter how big or small, whether you’re a do-it-yourselfer or a pro, a job done right is a job you can take pride in. Using professional caulking tools will go a long way toward getting you there. So invest in good tools and take the time to learn to use them properly. We promise it will pay off in the long run, and ensure your projects look great while doing the job they were intended to do.
